

Getting a greenhouse opened up so many opportunities for me to advance my gardening goals. In this week’s encore, I’m sharing what there is to know before getting a greenhouse and my top tips for taking full advantage of it once you have one.
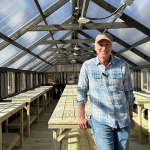
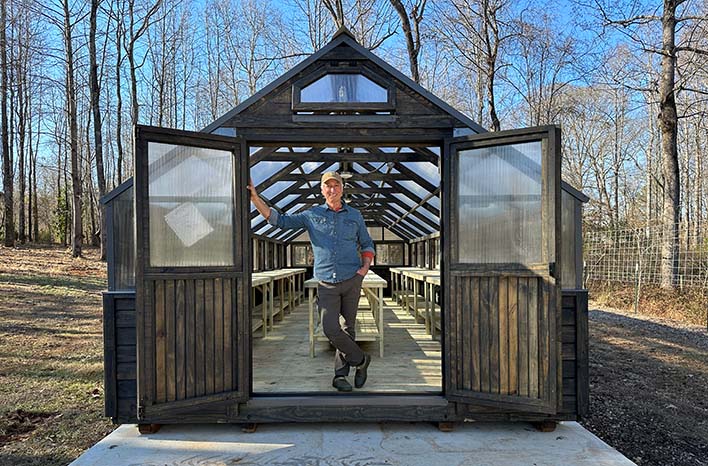
My greenhouse is by Yoderbilt, 12 feet by 32 feet and made of wood and poly, with big doors and 19 windows. It’s outfitted with ceiling fans and outlets.
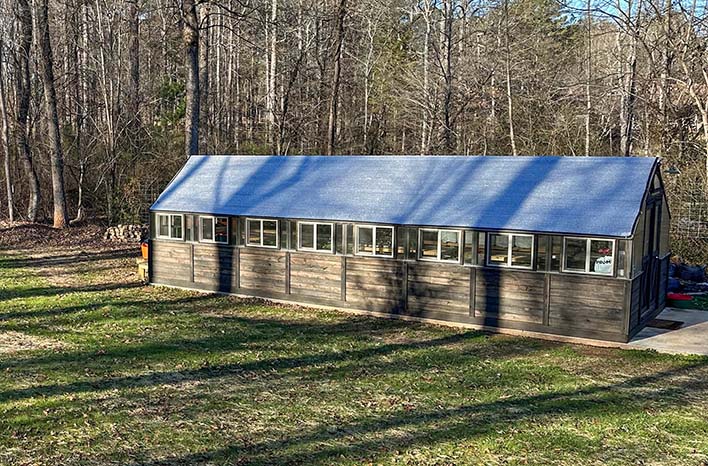
Here it is, all 32 feet of it.
For the unabridged version of these show notes, you can read the post from the original airing of this episode. Or read on for a condensed version.
Before continuing, I want to remind you that on Wednesday, November 19, at noon Eastern, I will be co-hosting a webinar on co-existing with deer and other mammals. Nancy Lawson, the Humane Gardener, will join me for this session. The cost is $29 plus processing fees. You can learn more about “Who’s Nibbling in Your Garden?” and register at Eventbrite.com.
Familiarize Yourself With Local Ordinances Before Buying a Greenhouse
Check local ordinances, zoning laws, and HOA rules before ordering or siting a greenhouse. Skipping this step can lead to fines, delays, and major headaches.
When I ordered my fully assembled greenhouse, I poured a concrete slab on what seemed like the perfect sunny, level spot — without checking setback requirements. I applied for a permit but didn’t hear back before the concrete was poured. Days later, I learned the greenhouse had to be at least 50 feet from the property line; mine was only 20.
I spent 10 months applying for a zoning variance, gathering drone photos, and preparing my case with help from my landscape architect friend, Peter Langham. In the end, the variance was approved — but it was a long, stressful process.
The lesson: confirm all zoning and HOA requirements before building. Be ready to answer every possible question so your project doesn’t stall or get derailed.
It’s important to make sure you are aligned with local ordinances before pouring a slab or having a greenhouse delivered.
Picking Out a Greenhouse
I long wanted a greenhouse to complement my garden, but it took me time to act for a few reasons, including aesthetics. Because my property often appears in my videos, I wanted a greenhouse that would tie in nicely with my house and garden. Some greenhouse styles and designs do that better than others.
I saw a video of Jill McSheehy of “The Beginner’s Garden Podcast” with her Yoderbilt greenhouse, and I said, “That’s the one I’ve been looking for.”
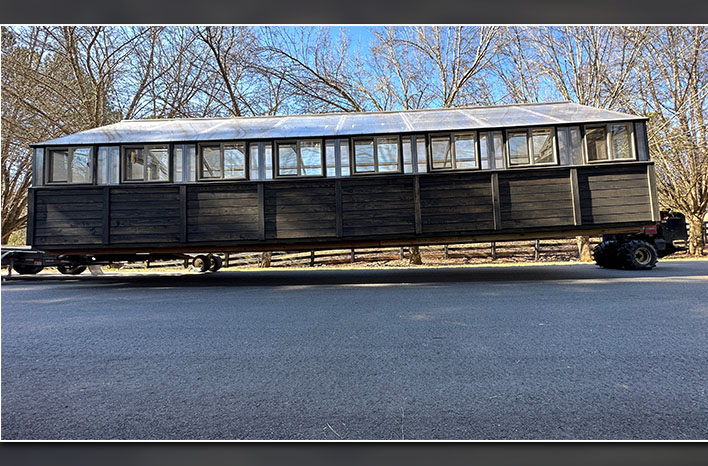
I spoke with Yoderbilt’s founders and owners, Travis and Angela Yoder. I thought I wanted a 12-by-24-foot greenhouse, but Travis talked me out of it. He told me I wanted something bigger, and the biggest Yoderbilt could deliver between Arkansas and Georgia is a 12-foot-by-32-foot greenhouse. He was right. I would have regretted ordering a smaller greenhouse.
Master Gardener and hobby greenhouse owner Sheri George, mentioned in my interview with her that a greenhouse owner has never said “I wish I had a smaller greenhouse.” All greenhouse owners, no matter how big their greenhouses, want a bigger greenhouse.
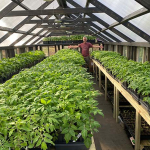
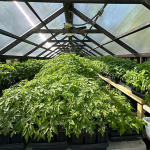
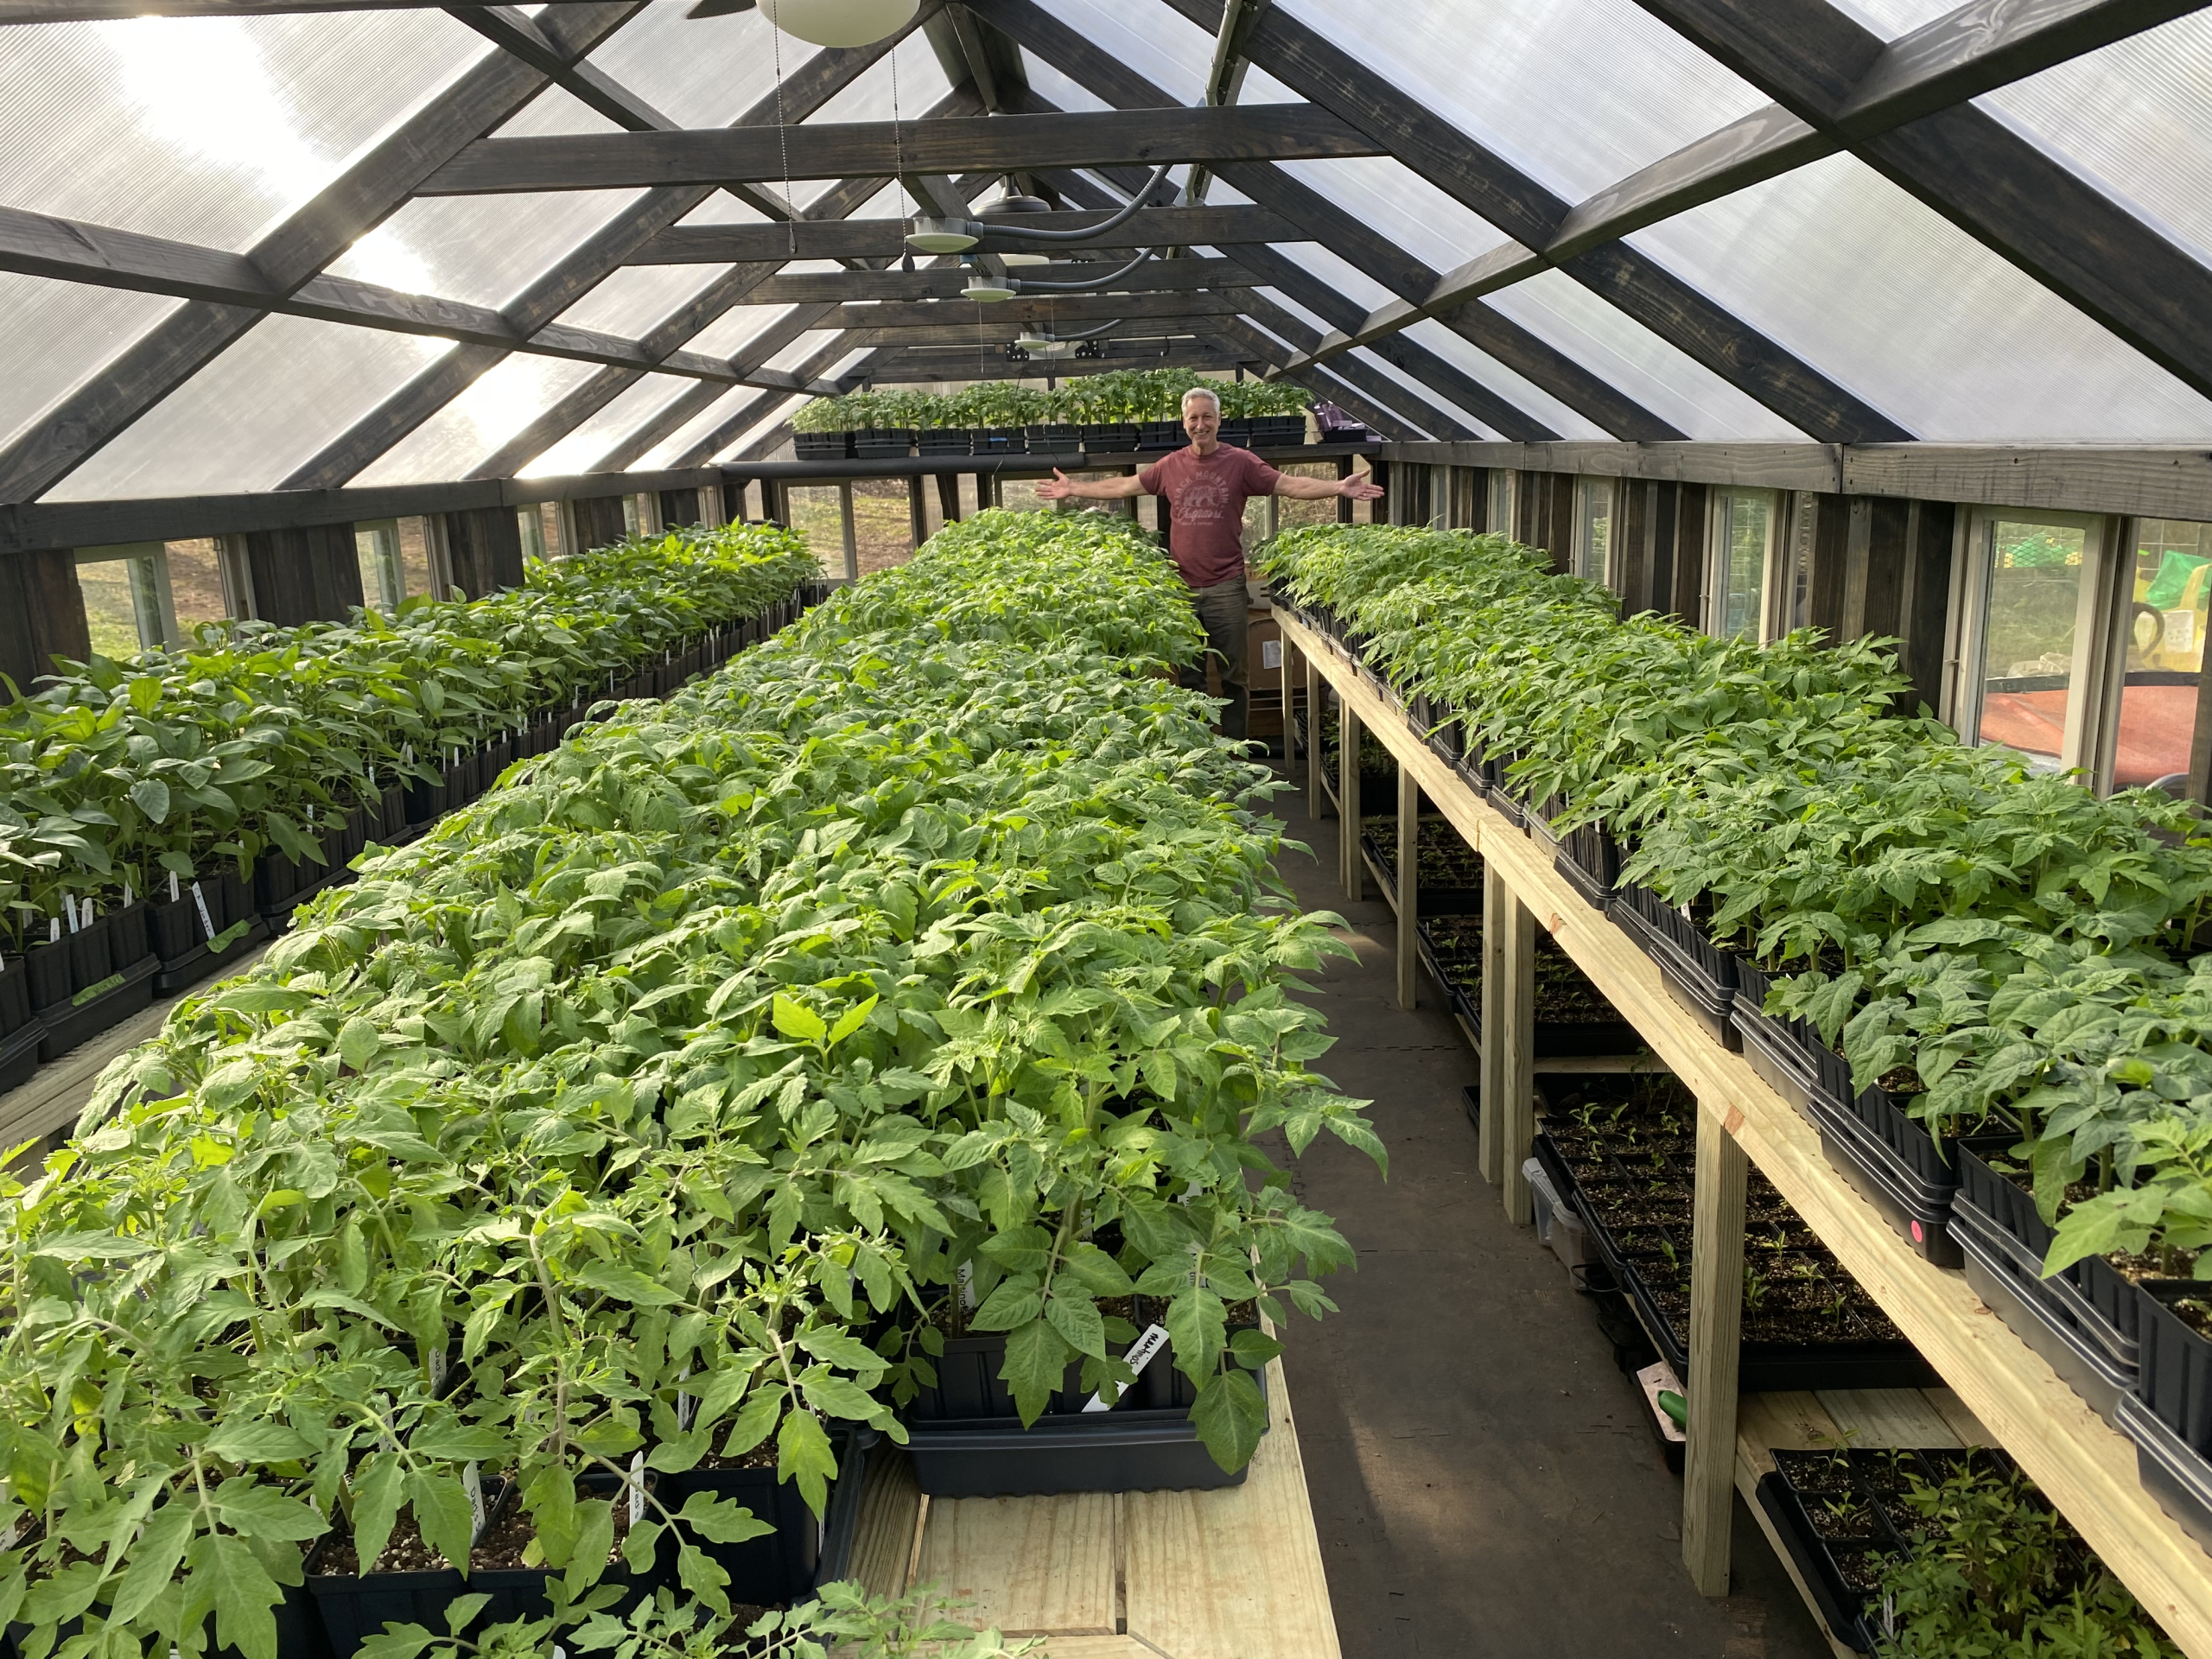
My greenhouse looks big when it’s empty, but I quickly filled it up to the point that I had no room left for even one more seed starting tray. I was still wishing for a larger greenhouse, but at some point, you have to draw the line.
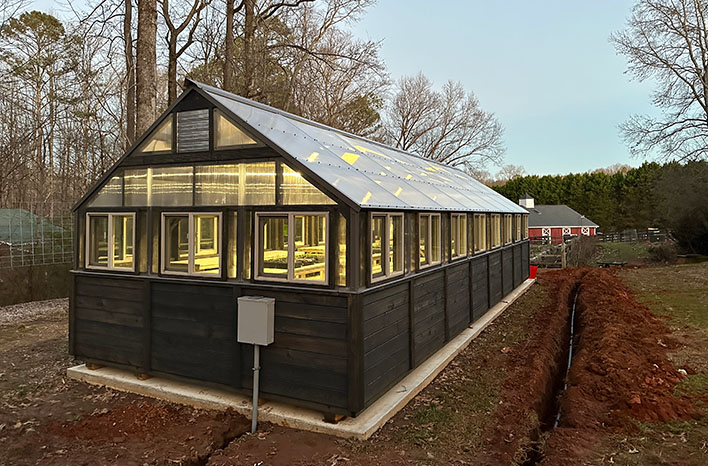
My greenhouse is wood-based, with a wood floor and sides halfway up, and polycarbonate windows on the top half. It’s beautiful, but quality is just as important as the look. When I read the reviews, I found Yoderbilt owners to be more than satisfied with their purchases.
You can get a good look at the greenhouse in this video of the delivery below.
Optional Greenhouse Upgrades
Yoderbilt greenhouses offer a range of optional upgrades in addition to their well-equipped base model. I added tables and benches for seed trays and pots so everything was ready to use on delivery — no setup hassle. You could build your own if you’re handy, but that’s not for everyone.
I also chose Yoderbilt’s electrical package to safely power germination mats, fans and heaters, rather than running unsafe extension cords or hiring an electrician later. To improve airflow, I added ceiling fans and extra windows beyond the standard ones. The difference in ventilation has been tremendous.
These add-ons cost more, but they’re worth it for a greenhouse that can last a lifetime. Retrofitting later would have been pricier and less efficient.
I planned for plumbing too, with a stub in the concrete slab, but running a water line under the driveway was quoted at $5,000 — not worth it. A hose and watering cans do the job fine. The pressure-treated wood structure stays dry enough that sealing isn’t necessary, and with mindful watering, it should last for many years.
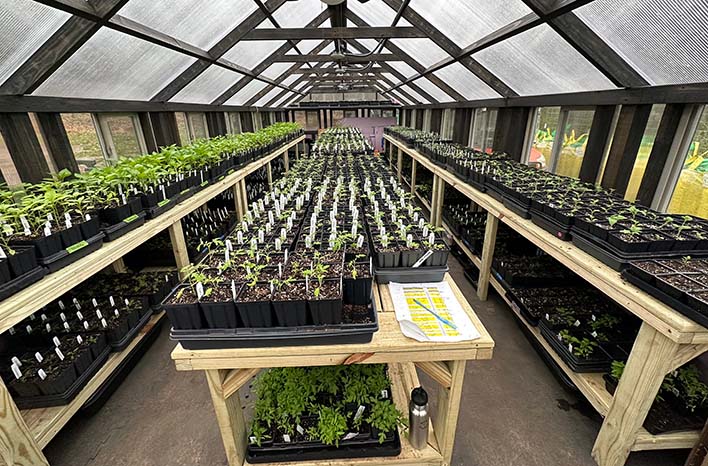
My greenhouse quickly became stuffed to the gills.
Winter with a Greenhouse
Because my greenhouse was delivered at the end of December, the first season I experienced was winter. I learned that the overnight temperature inside a greenhouse is the same as the temperature outside. Even on a cold day, a greenhouse gets warm or even hot inside, but after the sun goes down, that warmth dissipates.
To keep a greenhouse warm overnight in winter, supplemental heat and/or insulation is required. Some greenhouses are all poly so they really can’t be insulated, but my greenhouse has wood walls and had some gaps I could fill with insulation. The space between the skids that the greenhouse frame is built on and the concrete pad needed skirting to keep the warm air in overnight. I added insulating boards along the bottom, and that makes a big difference. For the air coming up from the wooden floor, I added 2-foot-square rubber puzzle-piece mats, and around the base of the walls, which are shiplap, I used foam boards.
The insulation kept the greenhouse 7 degrees warmer overnight. That’s not much, and that’s because it’s just a fact of life that greenhouses will always have air gaps where warm air can escape and cool air can get in. So this is where supplemental heat comes in.
If you intend to overwinter non-hardy plants in your greenhouse, you’ll need heaters. They could be electric, propane, kerosene, etc.
I use two electric oil-filled radiators in my greenhouse. These cost between $50 and $100 and work well. I also use a Palma greenhouse heater, which is very popular among greenhouse owners. It has a thermostat, so it only turns on when the temperature in the greenhouse falls below 50°F.
I also have propane heaters. They will ensure I can heat the greenhouse even if the power goes out. I also use a greenhouse temperature sensor that will send a push alert to my phone if the greenhouse falls below a set temperature. I use both a Govee and a SensorPush. In addition to alerts, they also track historical data such as highs and lows, and you can download it into a spreadsheet.
If you intend to overwinter non-hardy plants in your greenhouse, you’ll need heaters.
Prevent a Greenhouse From Overheating
In addition to setting alerts for lows, I also set alerts for highs. If a greenhouse gets overly hot, it can fry plants.
When mounting your temperature sensor, placement is important. I erroneously mounted a sensor 9 feet up, and the high point in the greenhouse is 12 feet. Because hot air rises, this was higher than the sensor should have been. The sensor is more useful at the height that the plants sit, because that’s the temperature that I really need to know. The placement made a 15° difference in the temperature reading.
On a blazing hot day, a greenhouse will heat up even hotter — and your plants will not be happy in an oven. This is why ventilation is so important. There are many ways to let out the heat: open the windows, use thermostatically controlled bevels, turn on the ceiling fans, and use the exhaust fan to pull air through and out.
Another big one is shade cloth. Some people put these inside their greenhouse, but I secured it over the top. Aluminet shade cloth, an aluminum fabric weave, knocked down the temperature by 15-20°. I put it on after the peak growing season in April and kept it on until I was ready to move my seeds in for seed starting in January.
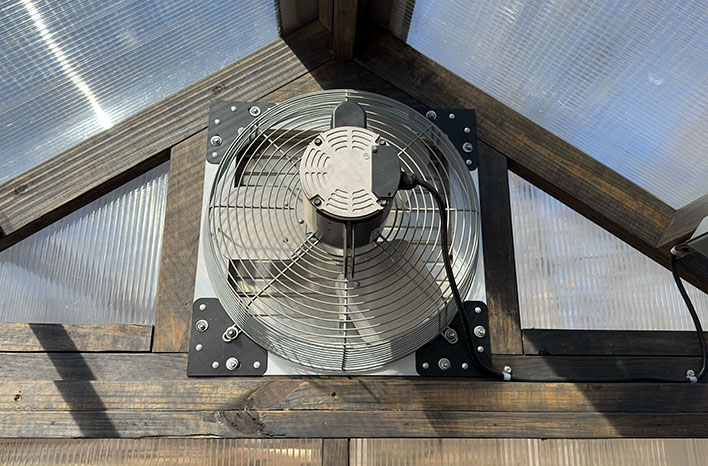
A ventilation fans moves hot air out of the greenhouse.
De-bug Plants Before Bringing Them In
Spray down plants with a stiff stream of water to get off the aphids and anything else that may be lurking. Once you bring pests inside the greenhouse, it only gets worse. They will thrive in that environment. I made this mistake and had to take my plants back outside to do what I should have done in the first place.
Understanding DIF
Because I sell seedlings, I need them to look as good as they possibly can in April. However, last year they looked picture-perfect in March and were still growing taller. The plants weren’t getting thin and spindly, but they were looking like trees. The internodal sections between the branching were not compact like they should be.
I theorized this is because I had so many seedlings bunched together and that they were competing for light. However, I learned this was not the case when I spoke to Dr. Charles Bethke, a previous podcast guest and the director of research development for PittMoss. Charles explains this is caused by DIF — the difference between the day and night temperature.
“If the night temperature is cold and the day temperature is high, you have a high DIF,” Charles says. “… That difference between night and day then stimulates the plant to do hormonal things. And among the hormonal things, it recognizes the high temperature and it releases a lot more auxins and gibberellins.” After a cool night, the gibberellins become more active in the plant the next day.
“It is wise to reduce that DIF by having warmer nights and cooler days,” Charles says. By adding heat at night starting when a plant’s first true leaves are fully expanded, you’ll have a much better plant. And reducing the day temperature for a couple of hours in the morning, starting at or before daylight, will hamper “hormonal translocation” — shutting down the movement of hormones from the roots to the shoots.
Plants will grow huskier, stockier and thicker in these conditions. It is an alternative to applying hormones to influence growth. Using DIF is why greenhouses can supply Easter lilies that are the perfect height, Charles points out.
He noted a study in Japan that involved watering tomato plants every morning at 9 o’clock with cool water. The study found that the plants had the same response. And it worked the same with other crops as well.
Greenhouse owners can cool a greenhouse by opening the vents at daylight, letting the temperature fall as low as 35°. After there has been enough daylight, the hormones will start moving freely again.
You can do either or, or you can both run the greenhouse warm at night and also cool it in the morning to achieve stocky growth.
Running a greenhouse warm at night and cooling it in the morning will achieve stocky growth.
I hope you enjoyed my conversation greenhouse tips and tricks. If you haven’t listened yet, you can do so now by scrolling to the top of the page and clicking the Play icon in the green bar under the page title.
What’s your advice for operating a greenhouse? Let us know in the comments below.
Links & Resources
Some product links in this guide are affiliate links. See full disclosure below.
Episode 049: When Good Bugs Eat Bad Bugs: The Business of Beneficial Insects
Episode 093: Hobby Greenhouse Considerations: What to Know Before You Buy (and After You Do)
Episode 295: Looking Back on 2022’s Garden Lessons
Episode 345: The Lean Micro Farm: Raise Crops with Maximum Efficiency
Episode 350: What to Know About Buying and Owning a Hobby Greenhouse
joegardener Online Gardening Academy™: Popular courses on gardening fundamentals; managing pests, diseases & weeds; seed starting and more.
joegardener Online Gardening Academy Organic Vegetable Gardening: My new premium online course. The course is designed to be a comprehensive guide to starting, growing, nurturing and harvesting your favorite vegetables, no matter what you love to eat, no matter where you live, no matter your level of gardening experience.
joegardener Online Gardening Academy Master Seed Starting: Everything you need to know to start your own plants from seed — indoors and out.
joegardener Online Gardening Academy Beginning Gardener Fundamentals: Essential principles to know to create a thriving garden.
joegardener Online Gardening Academy Growing Epic Tomatoes: Learn how to grow epic tomatoes with Joe Lamp’l and Craig LeHoullier.
joegardener Online Gardening Academy Master Pests, Diseases & Weeds: Learn the proactive steps to take to manage pests, diseases and weeds for a more successful garden with a lot less frustration. Just $47 for lifetime access!
joegardener Online Gardening Academy Perfect Soil Recipe Master Class: Learn how to create the perfect soil environment for thriving plants.
Electric oil-filled radiator heaters
SensorPush greenhouse temperature sensor
Govee greenhouse temperature sensor
Disclosure: As an Amazon Associate, I earn from qualifying purchases. I receive a commission every time you purchase a product through an Amazon affiliate link. Some product links in this guide are affiliate links. However, none of the prices of these resources have been increased to compensate us, and compensation is not an influencing factor on their inclusion here. The selection of all items featured in this post and podcast was based solely on merit and in no way influenced by any affiliate or financial incentive, or contractual relationship. At the time of this writing, Joe Lamp’l has professional relationships with the following companies who may have products included in this post and podcast: Milorganite, Soil3, Territorial Seed Company, Cool Springs Press / Quarto Group and Dramm. These companies are either Brand Partners of joegardener.com and/or advertise on our website. However, we receive no additional compensation from the sales or promotion of their product through this guide. The inclusion of any products mentioned within this post is entirely independent and exclusive of any relationship.